Run Websites in the Amazon Cloud

Windows Azure certainly isn't the only cloud offering for Internet professionals; Amazon's Web Services also makes the process rather simple. Discover the necessary steps to get your WordPress or other software systems running in the Amazon cloud quickly and easily.
Now while it's possible to do all the deployment yourself, Amazon provides a marketplace where Internet professionals can turn to in order to deploy popular software systems - like WordPress, or software in other categories including ecommerce, CRM and a whole lot more.
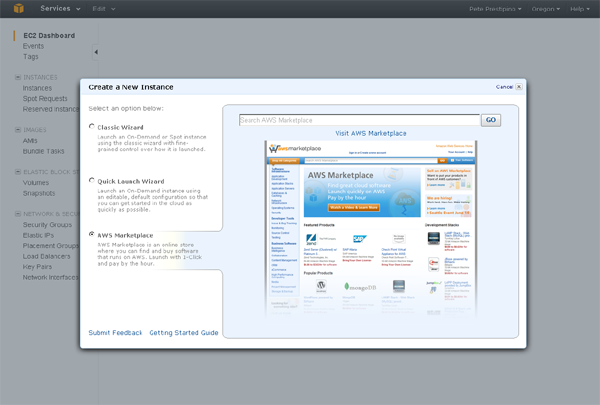
First however, it's necessary to set an instance on AWS. Log in to your Amazon AWS console and select EC2 (it's here where we'll be creating a virtual instance to host the new site). Click on "launch instance." You'll be able to select the classic wizard (an on-demand or spot instance which offers greater control of how it is launched), the quick launch wizard (an on-demand instance using an editable configuration to simply getting started) or the AWS marketplace - an online store where users can find and buy software that runs on AWS, launch with one-click and pay by the hour. Much like we did with Microsoft Azure's Gallery (see our August 2013 print and digital edition), to make the process as easy as possible, we'll use the AWS Marketplace.
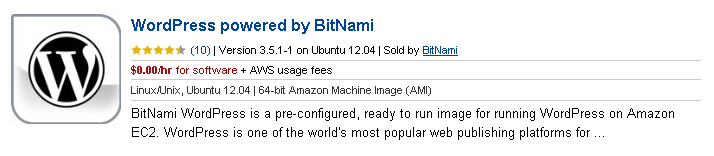
Type "Wordpress" in the available search box and a list of results will appear from vendors including Jumpbox, Bitnami and others which will enable you to quickly deploy the software on your new instance. For the purposes of illustration, we've decided to use the "WordPress powered by Bitnami" option, to launch our site.
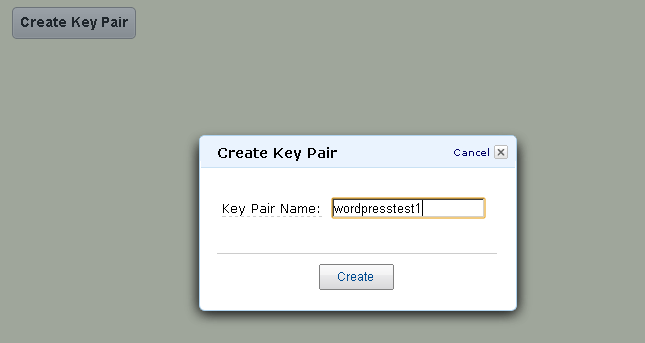
Since our aim is to get WordPress up and running quickly, we'll forego the details on launching with the EC2 console, and opt instead for a "one-click" launch. We'll still have control over a great deal of the deployment including the operating system version (we chose Ubuntu 12.04) the region (we chose US East - Virginia) and the actual instance type (the smallest available in the t1.micro). It's also important to set up your security group, which acts as a firewall that controls traffic allows to reach one or more of your instances. In our case, for the sake of time, we opted for the default group. Finally, you'll need to set up a Key Pair, which ensures that no one else has access to your software. The one-click launcher will prompt you to open the EC2 console where a new key pair can be generated. Once that key pair has been generated (see below) it will automatically appear on the one-click launcher as an option.
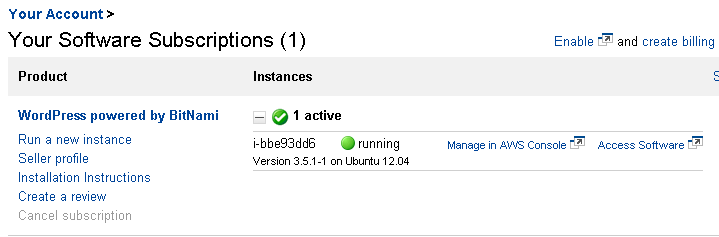
At this point, you're ready to accept the terms and launch your new WordPress website. Return to the AWS console in a few minutes and you'll notice that your EC2 Dashboard will be updated to reflect that you're now running one instance, one key pair, one security group, and one volume (which is kind of like a hard drive). Access your new WordPress site by revisiting your account in the AWS marketplace the software you selected from the AWS Marketplace.